6
USING THE GAS BROILER
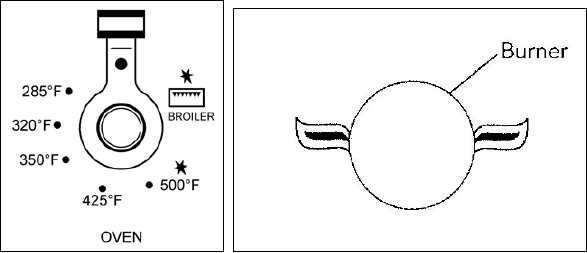
The gas broiler is controlled with the same gas oven knob, but turning it clockwise instead of counterclockwise (see the
gas oven use instructions), matching the symbol with the indicator. The broiler burner always operates at maximum and
therefore there is no minimum position. In addition, it is equipped with a safety device to prevent the flame from going
out. The gas broiler can also be ignited in different ways:
- Manual lighting: Just completely open the oven door, turn the knob so that the relative symbol matches the indicator,
while pressing the knob, and, at the same time, put a lit match next to the burner. Make sure that the burner is
completely lit and after about 10 seconds release the knob. Make sure that the burner remains on, otherwise repeat the
operation.
- Electric ignition: In this case, completely open the oven door, turn the knob so that the relative symbol matches the
indicator and, while keeping the knob pressed, press the knob with the spark symbol. Wait about 10 seconds after the
burner has been completely lit and then release the knob. Make sure that the burner remains on, otherwise repeat the
operation.
ATTENTION: To use broiler please utilize the proper broiler grid installed inside the grid enamelled tray supplied
with the appliance; broiler tray shall be supported by oven grid.
WARNING: As with the oven, the broiler must be lit with the door completely open.
The gas broiler can be used to broil foods on the oven shelf .
The gas broiler operation is indicated by a blue light
IMPORTANT: when broiling food keep the door closed..
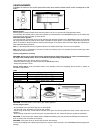
Verify that aspect flame of the broiler burner be completely blue and with an aspect as indicated in figure
Note: The use of a gas cooking appliance produces heat and humidity in the room where it is installed. Therefore, proper
ventilation in the room is needed and natural ventilation openings must remain unobstructed and activating the
mechanical exhaust fan/range hood. Intensive and continuous use of the appliance may require additional ventilation, for
example by opening a window, or increasing the power of the mechanical exhaust fan/range hood, if installed.
Note: the cooker is equipped with the cooling fan that starts operation each time the oven knob is on a position different
from 0 (zero). The fan circulates the air between the control panel and the oven door and also allows the control panel
and the oven door stay at a warm temperature during the appliance operation in any condition.
CLEANING THE APPLIANCE:
Never use abrasive cleaners
Before cleaning the appliance it should be disconnected from the power supply.
Cleaning the work surface: periodically clean the burner heads, the cast iron pan supports and the burner caps using
warm water.
Any spillage must always be removed as soon as possible using a rag.
If it become difficult to open or close a valve, do not force it, but immediately request the assistance of the
technical service personnel.
Cleaning the enamelled parts: Enamelled parts should be cleaned frequently with soapy water. Never use abrasive
powder. Do not leave acidi or alkaline substances on the enamelled parts (such as vinegar, lemon juice, salt, tomato
sauce, etc.) and do not wash the enamelled parts while they are still hot.
Cleaning the stainless steel parts: Clean the parts with soapy water and dry them with a soft cloth. The shine is
maintained by periodically using specific stainless steel cream cleaner. Never use abrasive powders.Use specific
stainless steel cream cleaner to eliminate the glue remains afther the elimination of the blue plastic protection film on the
worktop after installation.
Cleaning the burner caps: Lift the burner caps from the burner heads and wash them in soapy water and dry
thoroughly. Before replacement on the burner head ensure that the holes are not clogged.
Cleaning the inner glass door: Clean the glass with warm soapy water using a sponge. A spatula can be used to
remove burner fat if used gently.
ATTENTION: while cleaning the door make sure to avoid any spillage in the venting holes on the top part of the door. To
clean inside the door it is necessary to disassemble the door through a service engineer.
ATTENTION: for further details about cleaning of the appliance, please contact your applliance retailer.